Tuesday, April 26, 2011

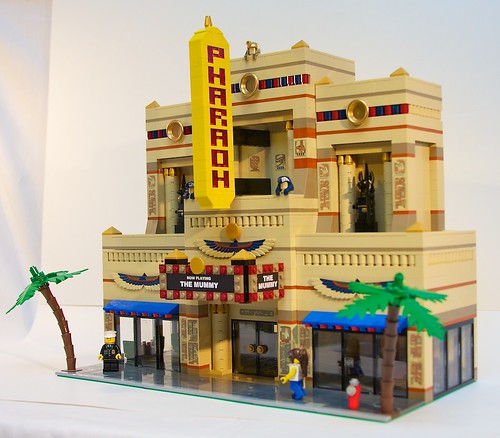
The Pharaoh Theater

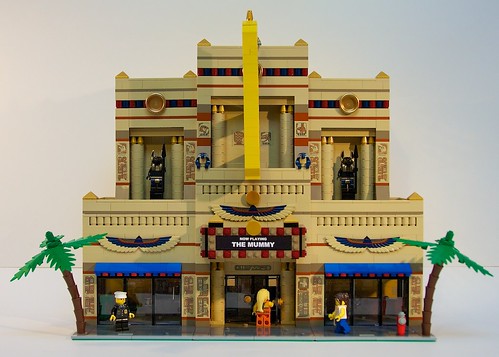
After finishing my first Lego movie theater awhile back, I've wanted to build another theater with more ornate details. The recently released Lego Pharaoh's Quest sets inspired me to finally build one in the Egyptian Revival style that was popular in the 1920s and 30s. This particular model is somewhat based on the Bala Theatre near Philadelphia, which I have been to several times. The building features small storefronts to either side of the lobby entrance.

Everything here is official Lego parts, except "The Mummy" signs which I printed on label paper. Egyptian parts are from two Pharaoh's Quest sets: Flying Mummy Attack and Scorpion Pyramid. In the future, I would like to build a full lobby and auditorium for the theater, including a balcony. For now I just wanted to get the front of the building completed in time for the BrickMagic Lego convention in early May. Throughout the process of building this MOC, I took pictures with my iPhone. In a future post, I'll use these photos to show the evolution of the building.

Sunday, March 13, 2011

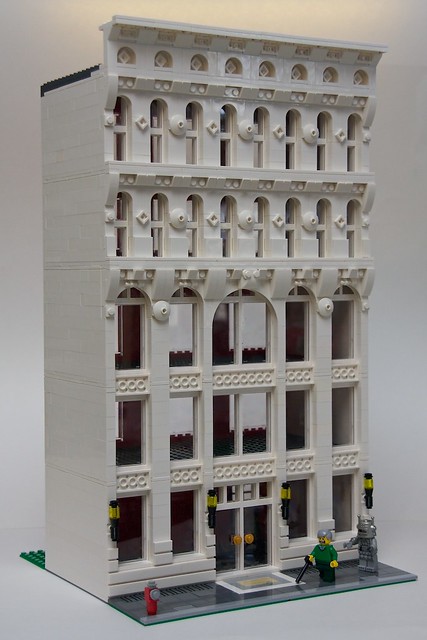
Old Glory Insurance Building

My latest Lego building is a five-story office building, inspired by various century old office buildings around Philadelphia and elsewhere. I decided to name it the "Old Glory Insurance Building" after a Saturday Night Live skit.

More photos are up on Flickr.

Friday, February 11, 2011

Organizing Lego

One of the most important skills a Lego builder should learn is organizing. You need to be able to easily find the part you're looking for, and you need to be able to quickly see what available parts you have a certain color or type. Good organizing takes time to do, but makes the building process go much easier and faster.

Lego builders have come up with all sorts of organization schemes. I don't belive there's one scheme that works for everybody and you need to experiment to find what works for you. I'll explain the scheme I use and how I got there.

As a kid, I kept most of my pieces in a big plastic bin. I think I set aside some smaller/special parts (such as minifigs and their accesories) in plastic pencil boxes, but otherwise it was very unorganized and hard to find parts.

When I got back into Lego a few years ago, I read the suggestion of grouping Legos by size/shape instead of color because it's easier to spot of a brick of a specific color amongst a bunch of the same size than it is to to find one of a specific size in a bunch of the same color. I gave it a try. I had a gallon Ziploc bag full of 1x1s, a bag of 1x2s, etc. What I discovered was when I was building, I usually needed just a bunch of bricks in a specific color without caring about the size. Having to dig through multiple bags to get all my red bricks was a pain.

I gave up on the part-centric scheme and started going with a mix of color-centric and type-centric. I separated out all my plain bricks (1x1, 1x2, 2x2, 2x4, etc) into bins by color. Other kinds of bricks were separated out by type. I had a bin of plates, a bin of tiles, a bin of round pieces, etc.

I highly recommend using clear plastic shoebox-sized bins. I use the cheap Sterilite 6 Quart bins, but any other brand is fine. The Sterilite bins can be found for $1.00-$1.50. If you can find them on sale, buy a ton of them. I also suggest sticking to the same brand/model for all the bins - the bins are easier to stack when they're all identical. Keep extra bins around for individual projects too.

Get a label-maker and label all your bins. Although the clear bins usually make it easy to spot what's in them (at least by color), labelling makes it even easier, especially when you have multiple bins of the same color.

As I accumulated more parts, I had to start splitting up bins. I split my plates bin into two: monochrome (grays, white, black) and colored. Eventually I had to split out them out further into grays, white, blacks and colored. I also broke out specialized plates (angled and curved) into their own bin as well. When I found that my red and yellow brick bins had filled up, I split each of them up into two: 1-stud-wide bricks and 2-stud-wide-bricks. This actually made things even easier, because I mostly need 1-wide bricks when doing walls of building.

I also have several of those plastic drawer organizers that people usually have in their garage for sorting screws, bolts, nuts, etc. I use them for small specialty pieces that I regularly need: small tiles, 1x1 and 2x2 round bricks and plates, antennas, cheese slopes, headlights, misc technic bits, etc. I recently purchased a second one of these, with even smaller drawers, for further organizing small pieces. (The third bin is for non-Lego electronics components.)

Within the bins themselves, I recommend doing further organizing, usually with plastic Ziploc baggies. If a bin has multiple colors (such as a bin of plates), sort the different colors in baggies. In bins of plain bricks that are the same color, I started building stacks of all the same type: a stack of 2x4s, a stack of 1x8s, etc. Not only does this make finding parts easier, but when you need a bunch of the same piece, just grab a whole stack out of the bin at once.

Besides the basic color bins, here's some of the bins I have so far:

  • Monochrome Tiles
  • Colored Tiles
  • Doors and Windows
  • Arches
  • Angled & Curved Plates
  • Technic
  • Car Parts (wheels, hoods, chasis, etc)
  • Castle Parts
  • Space/Plane Parts
  • Minifigs (City)
  • Themed Minifigs (Space, Castle, Pirates, etc)
  • Clear
  • Translucent

So far this organization scheme is working pretty well for me, but as my collection of parts expands, I'm sure it will continue to evolve. If I start branching out more into other building themes (castle, perhaps?) I may have to tweak things.
Tuesday, February 8, 2011

WMCA Transmitter Building in LEGO

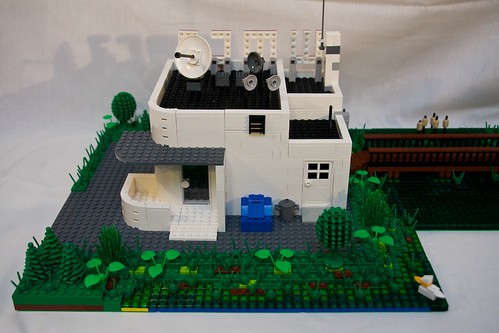
For years, I've been fascinated by the sight of the WMCA building in the middle of the swampy Meadowlands off the Jersey Turnpike. It stands alone on the edge of the road, while a small wooden bridge leads to the radio towers in the middle of the open water. I used to see it as a kid and had romanticized ideas of a lone DJ playing music late at night in the middle of nowhere. Recent bus trips to New York had rekindled my interest in the building. The actual building is only used for transmission. WMCA is currently a Christian radio station with a studio in NYC.

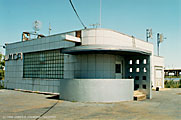
Meanwhile, I was talking with another PennLUG member about expanding the industrial waterfront section of our layout (which was also partially inspired by views from the Jersey Turnpike) and I had the idea of recreating the WMCA building in Lego. I based the model off a few photos I found online:

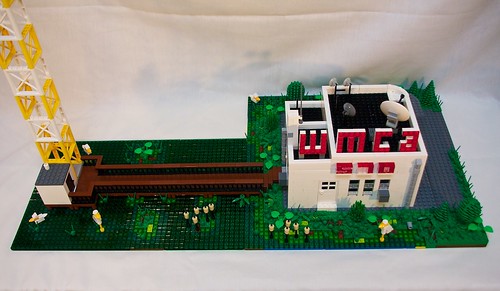
I built only one of the three radio towers the real station has. The coastline around the station is done in removable 8x16 modules while the building itself is on a plain 32x32 baseplate raised by bricks, so it could be reused elsewhere in a layout away from the waterfront. The roof is removable but I haven't done an interior yet. I might also do an alternate set of letters for the PennLUG layout, such as WPLG or WLGO.

Thanks to Nate Brill for some of the inspiration and Chris Edwards for the green water technique.

See the complete photo set on Flickr.

Monday, January 17, 2011

LEGO Kidsfest Hartford 2010

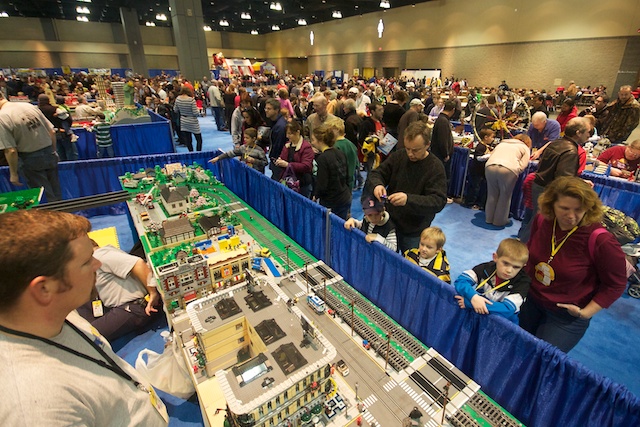
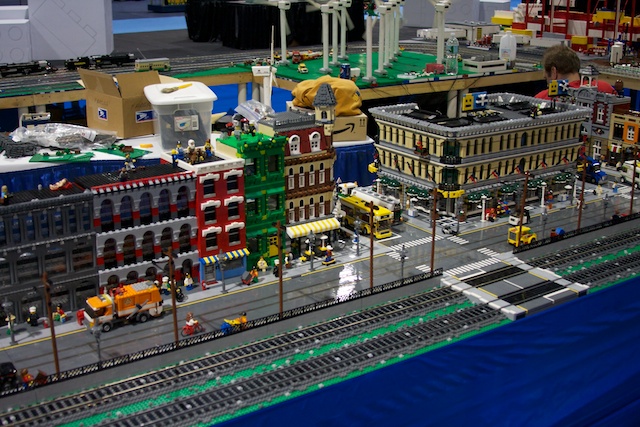
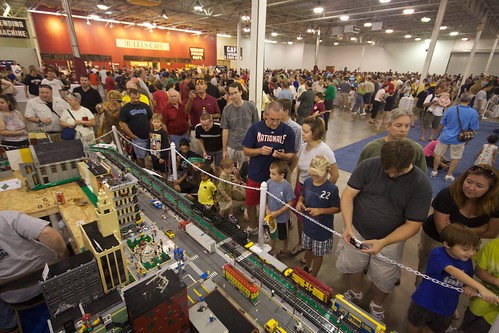
For the second year in a row, PennLUG was invited to display our train and city layout at the Lego Kidsfest event in Hartford, CT. Unlike fan-organized events such as BrickFair and BrickWorld, this was a promotional event was put on by Lego (partnered with another company) and geared toward children. I hadn't attended the first one in 2009, so I wanted to try the one in 2010. We were compensated by Lego for the event, including hotel and meals.
The layout wasn't as big as the one we had at BrickFair, and several of my buildings were at a display in Allentown so they couldn't make it to KidsFest. It still took over a day for us to setup.
We were busy for the whole event - setting up, tearing down, answering questions and keeping kids from touching the layout (we need Plexiglass in the future). It was actually very tiring. I'm not sure if I would do it again.
Many more of my photos from the event are up on Flickr.

Friday, August 13, 2010

BrickFair 2010 Photos

Last week I attended the BrickFair 2010 Lego convention at the Dulles Expo Center in Chantilly, VA. It took a few days to sort through all the photos I took, but I have uploaded the better ones to an album on Flickr.

Friday, October 31, 2008

Candy Corn's Dirty Secret

After years of mindless doodling in the margins of my notebooks during conference calls at work, I was hit by a bolt of inspiration last night and put those doodling skills (and my scanner and Photoshop) to work. I present to you a little comic for Halloween. Enjoy!

Thursday, October 23, 2008

Six Month House-iversary

Six months ago today I moved into my new home in the Fishtown section of Philadelphia. After ten years of watching my money go to landlords each month, last April I finally became a homeowner. Time has flown by and I don't think it has sunk in yet that this place is really mine. I suspect it won't totally sink in until I need to pay for my first major repair. I'll admit Fishtown wasn't my first choice. I would have loved a place in Center City or University City, but they were out of my price range. Fishtown was a good compromise - relatively safe and easy access to the rest of the city via the El. If anything, I wish I had found a place closer to an El station. Walking to the El adds an extra 10-15 minutes to my commute each way. On the other hand, there is a shopping center complete with supermarket, thrift store and a Radio Shack two blocks from my house which is very convenient. I haven't done much to the house yet, including decorating. The house was renovated a couple years ago and didn't need any work for me to move in. The biggest changes so far were adding a railing to the basement steps and installing a microwave over the stove. My dad is much more of a handyman than I am, so he's been a huge help. When I was looking at homes, I look at everything from fixer-uppers to newly remodeled homes. I'm glad I decided to go with something recently renovated. I don't see how I would have found the time and resources to do serious work on a house. There's still quite a few boxes from my apartment I have yet to unpack and my basement is full of stuff from my storage locked that I need to go through (and probably sell a lot of it). I wanted to have a yard sale at the end of summer, but that hasn't happened. Maybe next Spring? Some home projects I hope to tackle in the next few months:
  • Install a dishwasher
  • Install more shelving in the home office
  • Add exterior electrical outlets to the front and back of the house
  • Run a network cable from the home office down through the walls to the basement and up to the living room (for my Mac Mini media center / home server)
  • Put a pond in the backyard (that will have to wait till next Spring)
  • Try some basic X10 home automation
I do worry a little about burglars, so sometime I might try setting a webcam and some motion sensors that can send a message to my phone if something is amiss. I would have to call 911 myself, but its better than paying monthly security-system fees or dealing with false alarms. One downside to having moved in the Spring is that all the nice weather pulled me away from staying inside to work on things. I also spent time every evening tending my garden. Now that cold weather is here, I'll probably be staying indoors more and I can start getting more things done.

Tuesday, October 21, 2008

Don't Make Me Think (About Code)

I'm a stickler for clean, easy to read code. In fact, I'll take clean, incomplete code over working, unreadable code. It's alot easier to finish and maintain clean code than to clean up spaghetti code. One of the best compliments I've ever received in my career was from a coworker who told me that my code was a pleasure to read. While cleaning up some old Java code at work, I came across this line in a random number generator: seed += lastSeed++; I had do a double-take on that line. It's short but ugly and easily confusing. Does lastSeed increment before being added to seed or after? I even checked with a coworker and he wasn't totally sure the order of operations here. (Yes, lastSeed gets incremented *after* being added to seed. I even ran some test code to confirm it.) I'm pretty sure I had questions like these on my college C programming exams. I once read a book about web usability titled Don't Make Me Think by Steve Krug. The point of the book isn't that web sites should be dumbed down to be usable, but that their structure should flow naturally. A user shouldn't have to stop and decipher confusing or ambiguous links. Eg: Do I click "About Us" or "Support" to find a company's mailing address? Likewise, an important aspect of clean code is that it should be obvious how it works. It shouldn't rely on obscure language features or shortcuts. You shouldn't have to stop and ask yourself "Wait, what is this doing?" In the end, I made a simple change to the code: seed += lastSeed; lastSeed++; Yes, I added an extra line of code, but I removed any possible confusion about the order of operations. Sure, it's a simple example, but imagine if this code was being used for financial calculations. It would be way to easy to introduce a bug when it was being done all in one line. Cleaning up these things isn't just a matter of making things safer for junior level programmers (as the Java Ranch Style Guide reasons) - even the most experienced programmers make dumb mistakes. Straightforward code makes life easier for everyone.

Monday, October 20, 2008

Mac Mini Memory Upgrade

After the hard drive in my iMac died, I moved the Ubuntu Linux VMware image that runs my websites to the Mac Mini I have hooked up to my TV. Since it only had 1GB of RAM, I shut off some apps and extra services (both on OS X and inside the VM itself) to save on memory. It performed fine and I decided to let it host my websites permanently, rather than move it back to the iMac or to a dedicated PC I was building. The Mini is quieter, smaller and more power efficient than any PC I could put together. The Mini did need more RAM, so before I took my iMac out to be repaired, I removed its two 1GB sticks of RAM and put in two 512MB sticks I had leftover from previous upgrades. Last night I finally attempted to install the extra RAM into the Mini. I found some Mac Mini disassembly videos and photos online. After upgrading the RAM but before putting the case back on, I booted up the Mini. It booted fine and saw the full two gigs, so I shut it down, snapped the case back on and hooked it back up to the TV. I powered it on, watched it start to boot and walked over to the kitchen to start dinner, then I heard a second start-up chime. Umm, that's probably not good. The Mini finished booting up fine and I tried to pretend that reboot didn't happen. While dinner was in the oven, I fired up Front Row and started watching an HD TV show when the Mini suddenly rebooted again. There was no kernel panic, just a spontaneous reboot. Crap. I figured it was most likely a memory problem, but it could have also been an overheated CPU. I took it back upstairs and ran the hardware diagnostic CD. No problems found. Grrr. I pried open the Mini again. (Luckily the Mini was much easier to pry open the second time.) The RAM looked like it was seated in its slots just fine, but I took it out and put it back in again. Booted the Mini (without case) and tried playing the same video I tried before. It played fine. Started up two HD videos together and still no reboots. Excellent. As I started to put everything back together, the wire for the Airport antenna disconnected from the Airport card. Had to remove the carrier for the optical drive and hard drive again and plug it back in. I did a test boot of the Mini and it couldn't find my wireless network. Since I had run an ethernet cable down to the living room, I really didn't need Airport at the moment and considered leaving it as-is, but I didn't want to have to open this thing again later on if I did need wireless, so I removed the carrier again and disconnected then reconnected the antenna wire. This time Airport worked so I put the cover back on and hooked it back up in my living room. Powered it on and the fan started blasting at full volume. Arggh! I didn't think a little box could make that much noise. Took the Mini apart again and immediately noticed that another small cable had come disconnected from the motherboard. I reconnected it and did some tests without the case. Everything worked fine, so I put the case back on and tried another succesfull test before taking the Mini downstairs. The whole mess took about two hours, and the Mini has been working fine so far. Apps are performing better now with the extra gig of RAM. I will have to go buy two more gigs of RAM to put back in the iMac after the hard drive is replaced, but I will finally be able to use it for photo editing again. Upgrading the Mini wasn't as scarry as replacing the LCD screen on my MacBook, but definitely not something I would recommend the average computer user ever attempt.